What you need
- A hardware modded original XBox console (not XBox 360)
- A CD/DVD Burner
- Slayer's Auto Installer Software
- XBox Media Center Software
- A home computer network with your XBox connected along with your computer
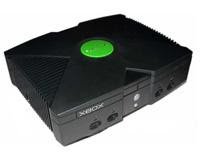
What is a modded console?
The XBox console by default comes with a variety of software and hardware security mechanisms that prevents it from being used for anything other than its original purpose. However, due to its immense popularity a variety of ways were invented to circumvent its software and hardware security features - this is called modding. There are broadly two forms of modding possible - a software mod and a hardware mod.
- Soft Mod: The software mod or a soft-mod is usually exploited by a known flaw in the XBox software or game. This usually results in the loading of a hacked BIOS into memory which then allows you to override the default security mechanisms. This does not require any physical modification of the XBox - however it is usually not the most reliable form of modding.
- Hardware Mod/Mod Chip: A hardware mod is usually achieved by physically soldering a hardware chip on to the XBox motherboard which installs a BIOS that overrides the default XBox BIOS thus taking control of the XBox console and removing all factory security mechanisms. This is the recommended way to mod your XBox for use with third party software like XBox Media Center - but please remember that you void your warranty by doing a hardware mod.
Step 1: Download a good FTP client software
Smart FTP is an excellent FTP client for this purpose. I would highly recommend you download and install it prior to starting the installation. It has excellent recursive directory unload/download capabilities with excellent user interface making it the best tool for this purpose.
Step 1: Network your XBox console to your computer
The first step to installing XBox Media Center is to establish a connection between your XBox and your computer. Connect the Ethernet port of your XBox to your network switch/router or directly to your computer via a cross-over cable. Make sure you are able to see your XBox from your computer. You can either assign a static IP to the XBox or a dynamic IP depending on your network settings. To verify that your XBox and your computer can see each other, try FTP'ing into your XBox. Use the IP address of the XBox to connect via your FTP client software such as Smart FTP - use the default port 21 and the following username (xbox) and password (xbox). In case you are unable to determine the IP address of your XBox or are not familiar with FTP, then do not despair - you can still setup XBox Media Center - read on.
Step 3: Backup
The most important step before we do anything is to backup everything on your XBox to your computer before we attempt to install XBox Media Center so that you can restore everything back to its original state if something goes wrong. In order to perform a backup, you MUST have the FTP connection to your XBox as described in Step 2 above. You can skip this step and proceed to Step 4 at your own risk if you do not know how to setup FTP or use the software.
Step 4: Power Backup
It might be a good idea to plug in your XBox console to a UPS to avoid a power failure during the installation. A power failure during installation will not severely damage your XBox but this is a precaution worth taking.
Step 5: Download Slayer's Auto Installer
Slayer's Auto Installer is an excellent piece of software that will enable you to very easily install XBox Media Center (along with a lot of other software) on your XBox. You can find the software here. Download the installer ISO file to your computer.
Step 6: Burn Slayer's Auto Installer to a brand new CD-RW
I cannot emphasize this enough - don't skimp on this step by using a used CD-RW. Make sure to go and buy a brand new CD-RW (Moser Bear worked for me) on which to burn the ISO image of Slayer's Auto Installer. The reason for this is that the XBox DVD Drives have lasers of very low intensity and are very picky when it comes to reading discs. Use Nero or any DVD Burner software to burn it on the CD-RW disc. Ideally burn it as a very slow speed (4x) rather than at high speeds (16x-20x) for better chances of success. Slayer's Auto Installer will come with an older version of XBox Media Center - which is what we will install to start with. But do not worry, you will not be stuck with this old version, we will also discus how to upgrade it to the latest version - but that's getting ahead of ourselves now aren't we :)
Step 6: Run Slayer's Auto Installer on your XBox
The next step is to pop the newly burned disc with Slayer's Auto Installer into your XBox and reboot. If everything goes will you will see the Slayer's Dashboard instead of the default dashboard that you used to see earlier. If for any reason, you do not see Slayer's Dashboard after rebooting, make sure you have correctly burned the ISO image on the CD-RW. Also try with different brands of CD-RW till you find one that works (Moser Bear worked for me). This was the part where I got stuck a bit because I thought it would be OK to use an old CD-RW and it failed - it worked when I finally used a brand new CD-RW disc.
Step 7: Installing Slayer's Dashboard on your XBox
If you have come this far, then this next step will change your life forever :). Navigate through the Slayer's Auto Installer software menu and first backup your HDD Key/EEPROM/BIOS. By default it will be stored in the C:\Backup directory of your XBox. Use the FTP software to get this backup on your computer als0 (you may need the backed up HDD Key/EEPROM/BIOS to recover later). Now select the installer option 3 - New Install/Full Rebuild. Here I am assuming that you have a retail XBox with the standard hard disk. If you plan to install a new larger hard disk in your XBox - this is the time to do it. All you need to do is drop in the new hard disk and the software will do everything else for you. Once you select Menu 3, you will have further options:
- 3 a) New Install/Full Rebuild - Upgraded HDD
- 3 a1) Full Install/Rebuild Large HDD - *C* 5960
- 3 b) New Install/Full Rebuild - Retail HDD
- 3 b1) Full Install/Rebuild Retail HDD - 4920
- 3 b2) Restore Retail Xbox HDD to Factory
- Format your XBox hard drive
- Install Microsoft Live Dash 5960, Evox Dash, XBox Media Center and the rest of the software on the installer disc.
- All applications will be installed in E drive as the F drive may not be available on all retail versions of the XBox.
- The applications will all be pre-configured to work with each other after the install is done.
Step 8: Experience the magic
Now is the time to sit back and enjoy the fruits of your hard labor. Now remove the Slayer's disc from your XBox and reboot. This is the moment of truth. If the installation was successful, you will now boot directly into Slayer's Dashboard after you turn on your XBox. If this happens, then everything worked. The default dashboard displays a lot of useful information such as your IP address. Now select the Applications menu and from there the XBox Media Center menu to run XBox Media Center. This will launch the XBox Media Center software and you will now see the home screen of the XBox Media Center. This of course is an old build of XBox Media Center bundled with Slayer's Auto Installer. You can upgrade this to the latest T3CH SVN build of XBox at any time as described below.
Step 9: Upgrading your XBox Media Center Software
The mechanism by which we will setup and install XBox Media Center on your XBox is via FTP. Once you have performed all the steps above, you can upgrade the old version of XBox Media Center that came pre-installed with Slayer's Auto Installer by following the steps below:
- First find and download the latest T3CH XBox Media Center build - Google T3CH XMBC or try this link.
- The XBox Media Center build is usually a ZIP or RAR file that you need to unzip into a folder on your home computer
- Now start your XBox and go to the default Slayer's dashboard (do not launch XBox Media Center)
- With the XBox turned on, now use the FTP client and establish an FTP connection between your XBox and your computer.
- Log into the XBox using the FTP client using the following settings:
- IP Address: IP address of XBox as displayed in the dashboard
- Port :21
- Username: xbox
- Password: xbox
- First backup your user data that is in the E:\Apps\XMBC\UserData folder. This will save all your settings and configurations.
- Now use the FTP client software and upload (note upload and not download) the XMBC directory from your home PC to the E:\Apps\XMBC directory on your XBox. This will transfer all files from the XMBC build that you extracted in Step 2 into the E:\Apps\XMBC folder of your XBox.
- Once you transfer all the files to your XBox, now upload the User Data folder you saved in Step 6 into the appropriate folder E:\Apps\XMBC\UserData - this will restore all your original configuration and settings.
- That's it - you are all set. For good measure, reboot your XBox and start the XBox Media Center software from the menu - it will launch the new version if you followed all the steps correctly.
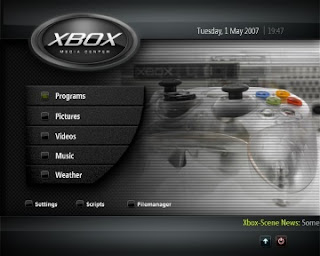
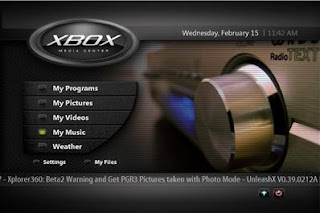
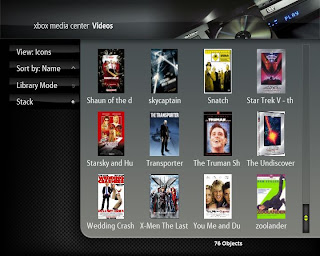
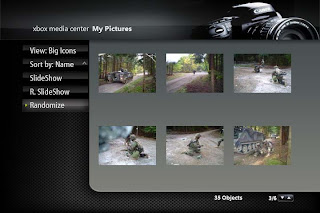
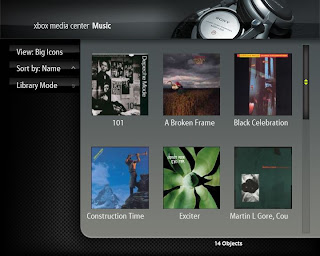
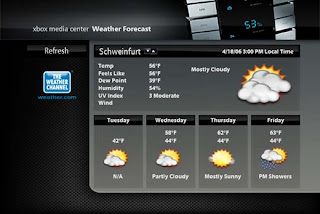
Here are some screen shots to give you an idea of the capabilities.
Start Screen
My Videos
My Pictures
My Music
On Screen Display
My Weather
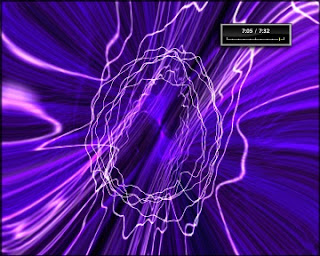
Music Visualizations
Resources:

