Sunday, December 03, 2006

Zune software for XBox 360 digital media sharing

Microsoft has replaced Windows Media Player 11 with Zune as the digital media sharing software of choice for the XBox 360. You can download a copy of the Zune software here. The basics steps are as follows:

  1. Step 1: Download Zune software.

  2. Step 2: Launch Zune.

  3. Step 3: Turn on media sharing.

  4. Step 4: Removing Existing Connection.

  5. Step 5: Configure your Xbox 360.


The setup takes a while even on my 512 kbps broadband connection and once everything was installed, it prompted me to restart my computer. After logging back in, I turned on media sharing in Zune to enable sharing my pictures, music and video with the XBox 360 - this feature is configured a lot better in Zune than in Windows Media Player.

Once I had it all hooked up, I connected my laptop to my XBox 360 and took it for a spin. The verdict - amazing and smooth integration between the digital media on my laptop and the XBox 360 with fantastic ability to start/stop/play my digital content with ease. Highly recommended.

Product Review - Pioneer HDMI DVD Player - DV 490V


The Product

Pioneer HDMI DVD Player DV 490V-S is a progressive upscaling DVD player that can output video signals at resolutions of 420p/720p/1080i. It supports virtually all output connectors including, in the order of video superiority, HDMI, Component, S-Video and Composite. It also has the ability to output the audio signal with either HDMI, TOSLINK (optical digital audio connector), Coaxial or Composite connectors. Additionally it is DivX certified and also supports all common CD/DVD formats. And finally the most important feature of all - this is a universal region free player that plays both PAL and NTSC formats!

This last feature was specially important for me as I discovered that my XBox 360 was a Region 5 locked PAL system and my old Sony DVD Player is a US Region 1 player. I can now go to my local Crosswords store in Pune and buy DVD's with reckless abandon and be sure that it would work without once having to read the back of each DVD for region encoding information - trust me its a really liberating feeling!


The Features
The main features of the player are as follows:

  • Universal Region Free Progressive up-scaling DVD player

  • Universal power adapter works at 110V/230V with power cords included for both

  • Supports video output at 480i/480p/720p/1080i

  • HDMI,Component,S-Video,Composite video outputs

  • HDMI,TOSLINK, Coaxial, Composite audio outputs

  • DivX certified player

  • Plays Audio CD, VCD/Super VCD, Fujicolor CD, DVD Video, DVD-R, DVD-RW, DVD+R/+RW discs

  • Supports ISO 9660 CD-ROM containing MP3, WMA, JPEG or DivX video files

  • Supports MP3, WMA audio format playback

  • Dolby Digital, DTS


The Review

The Box: The player I got was silver colored and very light compared to my first generation Sony DVD player. The front panel sports a lot of impressive logos including HDMI, DivX, DVD and CD.

The first thing I noticed was that the on/off switch is a little hard to the touch and not very tactile - so its really hard to tell whether you have actually turned the player on (specially if the TV is still off) as the LCD panel on the front is mysteriously blank when you power up and comes on only after a while (20 seconds). I would expect to instantly see a 'Power On' message on the front panel LCD screen as soon as I turn on the device.

The open/eject button is also recessed a bit too much into the case causing you to have to really press hard to manually eject the disc. The front panel is designed to make you want to use the remote and never come anywhere near the player except to change disks.

However on a positive note, a really cool thing about this player is that the box I got shipped two power cord connectors - one for 110V AC and the other for 230V AC. This is really nice because I have my home theatre mostly running on my US 110 V equipment and could use the 110V connector to connect the DVD player to my power strip without having to fiddle around with an adapter - nice touch!

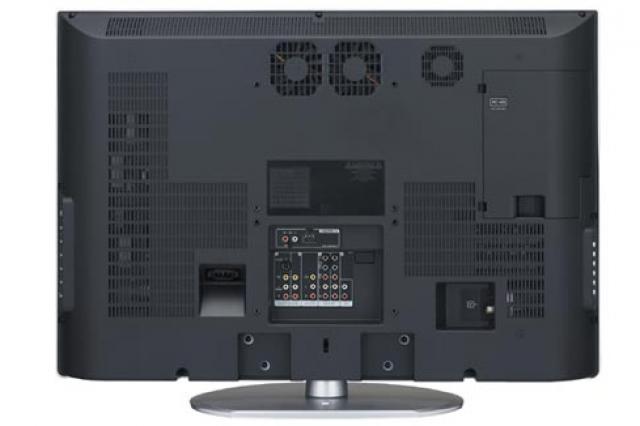
The Back Panel: The back panel was certainly more impressive than the front. Sporting all kinds of audio and video connectors you could ever want - it is complete in this respect with support for HDMI, S-Video, Component, Composite, Optical Digital (TosLink), Coaxial to name a few. Pioneer left me no room to complain on this front - err back.

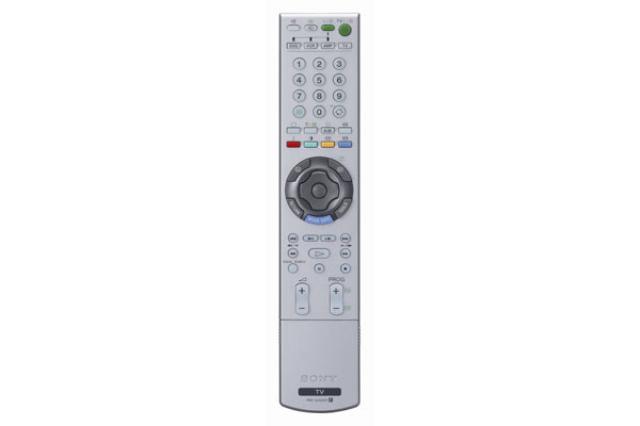
The Remote: The remote sucks! Plain and simple. Its a small cheap affair in grey plastic with buttons that feel very rubbery and mushy under your fingers and require violent jabs to get working and definitely looks like it needs to be broken in before it can be used comfortably. Sad that a player with such amazing features and value - should ship with such a cheap and tacky remote.

The remote has all the usual buttons one expects - and some buttons like Display are really neatly positioned (bottom right) - this is specially helpful if you want to check the sampling rate and other audio/video details in real time while the disc is playing.

One button that I thought seemed to work rather inconsistently, was the Subtitle button - pressing this button did not always toggle the subtitles on some of the DVD's I played. I kept getting an error message despite the fact that the DVD was authored with multiple subtitles. I had to go to the DVD main menu to change the subtitle manually. I am not sure if this was a DVD authoring issue or an issue with the player/remote.

Other than this quirk, the other buttons work as expected.

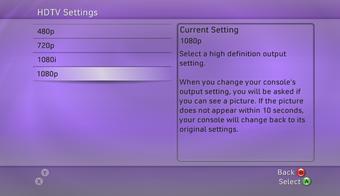
The On Screen Setup Menu: This is one area where the Pioneer really shines. The interface and menus are not as slick as the XBox 360 (I wasn't expecting it to be either) but are certainly a huge improvement over my old Sony DVD Player.

The menu options are logically grouped and intuitively laid out, making it a snap to navigate. Some of the key audio and video options need to be configured before you can use the player to output high definition digital audio and video.

The Picture: And now for the main part - the picture! This is one area that the Pioneer does a great job - for the value that it comes at - it delivers a really nice crisp picture with good color rendering and saturation. Obviously it won't handle every little detail like moire patterns or eliminate every single jaggie or pixelation artifact - but for its price it does a remarkable job rendering the picture very clearly and with excellent color. I tested most of my reference discs such as King Kong, Ice Age2, Cars, Kingdom of Heaven and a few others and overall felt that I had made a really good purchase.

I downloaded a Bittorrent version of the BBC Blue Planet documentary in XivD format to test out the DivX capabilities of this player - and true enough as soon as I popped the disc in the drive, the player recognized it as an MPEG4 media. The DivX playback worked pretty well, except for one small annoying detail. The XviD output was off by a few scan lines - so I had a few of the bottom scan lines appear on the top of the display in a rather irrating fashion - but I was still able to enjoy the digital picture and audio despite this minor annoyance.

I also popped in an MP3 audio disc and used the Disc Navigator menu item to traverse the folders on the disc and play the songs I wanted. This feature works pretty well and is easy to navigate. The MP3 playback was also upto my expectations.

The only disc that did not work on this player was a Microsoft High Definition Media Showcase clip that was in a .avi format. The player did not recognize this format and refused to play this disc - my XBox 360 however had no problems playing this disc. The Pioneer supports a few documented video file formats and restricts playback to only those devices. Here is where an upgradable device like the XBox 360 really shines - being a software/hardware platform the flexibility and ability to support multiple audio/video codecs down the road is possible while it is not so easy with the DVD player where firmware upgrades are the only way to go.


Conclusion
The Pioneer DV-490S is a great value for money for the features it delivers (Region Free capability, Universal player, HDMI and 1080i upscaling are the top features in my opinion). Compared to the Samsung HD-860, this player has a better video and audio processor and more favourable reviews overall whereever I looked. There are certainly areas for improvement in the player such as a more tactile front panel and better remote but these can be overlooked as minor annoyances in the face of the excellent picture delivery that the player is capable of at that price. So overall I would recommend this as a strong buy as a backup DVD player for your XBox.

Resources:

Friday, December 01, 2006

XBox 360 Dashboard Update - II

30th November 2006:
A new XBox 360 Dashboard update is now available. You will be prompted to download the update as soon as you log into XBox Live. This update contains fixes for the following:

  • Improved support for HD video output over VGA, including 1080p resolution

  • Improved plug and play performance for wired headsets when being used with wireless controllers

  • Changes made to recently played games list to improve accuracy


This information is courtesy Major Nelson's blog. This is a very important fix for Sony/Samsung high definition TV owners as it fixes the problems related to certain Sony/Samsung TV's not being able to do 1080p on the component/VGA connector which was one of the key features of the original dashboard fall update patch. With this fix, all problems related to 1080p output over component and VGA should now be resolved.

Resources:
Major Nelson's Blog
Engadget - 1080p problem with the fall update
Engadget - 1080p fix update
AVSForum discussion of the 1080p fix

Monday, November 13, 2006

Screen Tearing Explained

You may have heard of gamers complaining of screen tearing in forums and posts and may be wondering what the heck they were complaining about. If you have a device that can output a large number of frames per second (fps) such as a computer or a gaming console, - then depending on your output display device such as your computer monitor or your TV and its settings, you may experience screen tearing if your fps is way more than your TV can handle.

What is screen tearing and how does it affect me?
To understand the screen tearing effect, you need to understand the rate at which your gaming console or computer sends images to the display device. This rate is measured in frames per second and is the number of frames that are composed by your gaming console or computer and updated to the output display panel (your TV for example) per second. A high fps indicates a powerful gaming engine (hardware and software) and results in a very smooth image on your screen - assuming your TV can handle it.

Wait a minute - what was that again? Yes - that's right - your TV needs to be able to handle it and draw each frame on the screen as quickly as your gaming console, such as the XBox 360, can output the frame. So for instance consider this sequence of events:


  1. Gaming console generates frames at 24 fps

  2. The first frame is generated by the console and sent to your TV

  3. The TV accepts this frame and is busy repainting the screen with this image

  4. While the TV is repainting the image, along comes the next frame, even before the TV has had a chance to update the first frame

  5. What happens now is that the second frame starts updating on the top of the first frame and you have an old frame and a new frame at the same time on your TV

  6. The clean horizontal split between the old frame and the new frame looks like a tear as the image gets distorted at that point causing a screen tearing effect.

  7. As the console outputs more frames than the TV can handle, this effect can be come quite pronounced and be very distracting and unpleasant to watch.


Here is what it looks like (click on the image to view a larger image):


How do I avoid it?
The way to avoid this is to match your fps with the refresh rate of your output display device. This is handled with a flag called the VSYNC flag - that needs to be turned on - your game or your TV setup screen may have this setting. Turning the VSYNC flag on means that the output device will not start drawing a new frame on screen until it has had a chance to completely display the old one. This means that you may generate say 24 frames per second, but your display will only be able to display 12 frames per second if that's all that it can handle without the screen tearing effect. Double and triple buffering techniques can be used in either the software drivers or hardware to hold the extra frames in memory while the current frame is being rendered - however this approach requires more memory for it to work.

Sunday, November 05, 2006

XBox 360 Dashboard Update - I

The Fall XBox Dashboard Update is now officially available.
OK guys - its out! It was released on October 31st 2006 and is available either as an automatic download from XBox Live Online or can be downloaded by connecting your console to a broadband network. Since we do not have access to XBox Live in India - I was curious to find out if I could update my console with the latest update - and boy was I pleased with my findings.

First of all here is how you can get the update - straight from the official Microsoft Press Release:


This free update for Xbox 360™ will be distributed via Xbox Live® to all members (Xbox Live Silver and Xbox Live Gold) with no disc or hard drive required. If you don't have an Xbox Live account, you can easily sign up free by connecting your console to a broadband Internet connection. Once online, downloading the update is fast and simple, and provides instant access to many new features.


Steps to update your XBox 360


  1. Turn on your XBox and make sure it is connected to a broadband connection.

  2. Go to the XBox Dashboard and to the XBox Live tab

  3. Once there, click on the XBox Live icon.

  4. You will get a screen asking whether you are interested in joining XBox Live.

  5. Click Yes

  6. Your XBox 360 will then attempt to use your network connection to connect to XBox Live.

  7. At this point it will detect the XBox dashboard upgrade and inform you that an upgrade is available and ask you whether you would like to download it.

  8. Click Yes and the download starts - it takes about a couple of minutes (on my 512 kbps broadband connection) and you are done.

  9. Once the download has completed, it will automatically restart your XBox.


How do I check if the download worked?

  1. To confirm that the download was successful, go to the System tab of the XBox Dashboard.

  2. Click on Console Settings and select Display

  3. Click on Display to see two options HDTV Settings and Screen Format.

  4. Select HDTV Settings and you will see 1080p as one of the output formats that you can choose.

  5. If you see 1080p on this screen, then you have updated your XBox 360 successfully.


What are the cool features included in this download?

It won't make sense for me to list all the features and duplicate information from the Microsoft website. Instead I will focus on the features that I think will most affect folks here in India:


  1. HD 1080p video mode support over VGA and component cables.

  2. Xbox 360™ HD DVD Player support.

  3. Stream WMV video from a Windows PC running Windows Media Player 11, Zune software, or Windows Media Connect.

  4. Play video from storage devices such as USB flash drives, Xbox 360 Memory Units, etc.

  5. Play video from CD or DVD data discs.

  6. Stream music, pictures and video from a Zune device.

  7. Improved visual quality of video playback.


Conclusion:


Microsoft has very strategically updated its console with 1080p support well ahead of the much anticipated PlayStation 3 release on November 17th. The timing for the 1080p and HD-DVD player support couldn't have come at a better time. Microsoft seems to have got an upper hand with a year's lead time over Sony as well as an established XBox Live online community. With the addition of 1080p support and HD-DVD support, Microsoft has checked off a couple of very important features on its checklist - and I am sure every gamer that owns an XBox 360 would be very pleased with this update capability of the console.


Resources:
Official press release from Microsoft
Details of the November 2006 XBox Dashboard upgrade
Complete list of features in the XBox Dashboard update

How to hook up your US NTSC TV to work in India

I returned back to India in 2002 after about 6 years in the US. I had purchased a bunch of electronic stuff while in the US and decided to bring it all back to India with me - and so my AV Receiver, DVD Player, 32" Sony CRT TV, XBox and Infinity Speakers and Sub Woofer sailed the seven seas in a container and thankfully made it to India in one piece. But when I got here I realized that it would take some work to get my NTSC TV to work in India and I went about figuring it out. Here is what I found out:

Key Differences between US and India TV Systems: The key things to note while using a US TV in India are:


  • The US TV broadcasts are in a format called NTSC while India uses PAL (also used in Europe and UK - no surprises where that came from).

  • The other main difference of course is the voltage systems in US and India. US has the 110-120V @ 60 Hz while India uses 230V @ 50 Hz


So the main challenges while using a US TV in India are solving the voltage conversion problem and the PAL-NTSC conversion problem. Fortunately after a lot of experimenting and tweaking I was able to find the right equipment to help me solve both problems.


Voltage Conversion:

Voltage conversion is handled by a device called a voltage converter. You can get step down converters that convert 230V-110V (which is what I need) and also 110V-230V (in case you take Indian electrical stuff to the US). If you go to the local electrical store, you can find small electrical adapters with low power ratings - if you take one of these and plug your TV into it - most likely it will blow up and take your TV along with it.

The problem here is that you need to find a power converter with the right power rating to hook up the TV because CRT TV's have certain minimum power requirements - specially when you turn them on and there is an initial surge which your voltage converter needs to be able to handle. You should look for the power rating in Watts of your TV - it should either be on the back panel of the TV or in the manual. Once you get the power rating you should get a voltage converter that has at least 25-50% more capacity than the rating. For instance, if your TV requires 200 Watts of power, consider buying a 300 Watt converter.

Connect one end of the step down voltage converter with the appropriate power rating to your mains power supply. Connect a power strip to the output of the step down voltage converter - making sure to connect the 110V output socket (some voltage converters have a switch that allows you to set the output voltage). Make sure your power strip is a simple pass through strip - otherwise if the power strip has internal circuits and is purchased in India, then connecting it to the 110 V output is liable to blow it up - be careful about this. Finally connect your TV to this power strip which is connected to the 110V output of the voltage converter.

You don't need to be concerned about the frequency difference in the US and India (60 Hz AC in US vs. 50 Hz AC in India) as most electronic equipment such as TV's dont really care about AC and convert it to DC inside anyways. The AC frequency difference will make a difference when you have heavy duty equipment such as a dishwasher or microwave oven - so don't bother running those kind of equipment on a voltage converter in India as there are more sensitive to the frequency difference.


PAL - NTSC Conversion:

Voltage conversion is a simpler problem to solve that the PAL-NTSC conversion. There are a couple of options here each with its own pro's and con's.


1.)Using a standalone PAL-NTSC converter/tuner: My initial impulse was to try and find a good PAL-NTSC converter/tuner - but try as I might I wasn't able to find a reliable one in India. I did a lot of research on this and did not find any that actually worked. I researched this on the Internet and found that really good ones were quite expensive ($700-$1000). So I gave up this line of thought after a few attempts all of which were unsuccessful.

2.)Using your Windows XP computer with a TV Tuner Card: The next option I tried was to hook up my Windows XP PC with a Pinnacle TV Tuner Card. I also had a beefy NVidia GeForce graphics adapter card that had an S-Video output. So I connected my TV Tuner to the RF cable and connected my computer to my TV using the S-Video connector on my graphics card. You can also use the composite video connector on your TV tuner card if it has one, but the signal quality will be lower that S-Video. This solution worked and I was able to tune into the cable channels using the TV Tuner card and was able to see reasonably good picture on my TV.

However this approach has some drawbacks. The main problem is that the computer needs to be started for each TV viewing session which is a real pain if you want to quickly catch something on TV. Also the graphics card was not quite able to fill the entire screen with the image - so I had some black bars on the top and bottom of the image. Also since this ran on the PC, there were many times when the PC would freeze and I had to restart - so it was quite frustrating and not the ideal solution.

3.)Using an external PAL Tuner with a PAL-NTSC Converter: Finally after a bit of research, I found a good solution. The first part of the solution was an external PAL tuner. This is a small box that connects to the cable RF input and comes with a small remote to change channels and control volume. It has a composite video and audio output.

The external PAL tuner can be easily purchased in India - I got mine from the electronics bazaar in Budhwar Peth in Pune for about Rs. 1500. I initially tried directly connecting the composite output of the PAL tuner to my TV - but that did not work. I found out that the video signal output by the PAL tuner was still a PAL signal. I had to find a way to convert this signal to NTSC.

That is where the second part of the solution come into play. After a lot of research I found a PAL-NTSC converter - The Com-World Professional Video Converter CMD 1200 - that actually worked. I had my brother in the US purchase one for me and ship it over. I connected the output of my PAL tuner to the input of the CMD 1200 PAL-NTSC converter and connected the output video of the CMD 1200 PAL-NTSC converter to my TV - and viola - wonderful picture with very good clarity and no black bars anywhere.

This turned out to be the perfect solution because I didn't have to keep booting up my PC, it turned on and off very quick and was simple to operate. Also the handy remote worked great to do the basic functions of changing channel and controlling volume. This is my current setup and I am very happy with it. The only downside to this that I can think of is that the converter costs around $300 - so my wife was up in arms about this purchase and argued that you could buy a new TV for that price. She was right of course, but it was about figuring out how to fix things and the cost really did not matter for me (hope my wife is not reading this :))

Update: A lot of people have questions about watching DTH (Direct To Home) content from providers such as Tata Sky, Dish TV or Reliance Blue Magic on their NTSC TV. Here is some information on how to do that.


Conclusion:

So that folks is the deal with hooking up a US NTSC TV to view cable channels in India. Do let me know if you have any questions or comments - I'd be happy to help out.


Resources:
Technical Specifications for CMD 1200
Voltage Converters
Wikipedia entry for NTSC
Wikipedia entry for PAL

Saturday, November 04, 2006

XBox 360 on my Sony Bravia High Definition TV

I recently purchased by XBox 360 Premium Box from a local Pune retailer. A few weeks later I also purchased my 40" Sony Bravia High Definition LCD TV. The first thing I did was hook up the XBox 360 to the Sony HD TV to see what it looked looked like - and boy was I happy with the results!

The XBox 360 Gaming Experience in High Definition: As soon as I hooked up the XBox 360 to my Sony HD TV and fired everything up, I was amazed by the clarity, colors and brightness of the panel. I connected my XBox 360 to the Sony HD TV using the HD AV component video cables that came with my XBox 360. I also used an optical digital cable (also called TOSLINK) to output the digital audio content to my Yamaha R-V1103 AV Receiver.

Note: The coaxial digital connection is superior to TOSLINK/Optical digital connection - and would have been my preferred connection, but it is not available on the XBox HD AV Pack

Since my previous TV as a non-HD TV, my XBox was originally configured for that TV. I got into the XBox Guide Menu and went to the System menu and changed the settings on the Console from standard TV to High Definition TV - as soon as I did that my picture went fuzzy and started doing strange stuff. That's when I remembered that the XBox connector had a small sliding switch at the bottom of the connector to switch between TV and HDTV. I changed the setting on my XBox connector and viola - the picture was phenomenally amazing!

I was really stunned by the clarity of the High Definition content. I also change the output setting from 480i to 1080i as this was the highest mode was supported by my TV (most LCD/Plasma TV's available in India right now do not accept 1080p signal). After that I shut down my XBox 360 and restarted it - the results were spectacular. The initial XBox 360 logo was displayed in HD clarity - the text on the screen had ultra-crisp edges - not a single jaggie - and super smooth - I was blown away.

I then popped in my Burnout Revenge game disk to check out the difference. Burnout Revenge can detect that your TV is set to HD mode and displays a special screen - EA High Definition Gaming - when in this mode. Once I started the game and got playing I notice the spectacular difference between playing games in standard definition and high definition. The colors were vivid, the details very clear, you could see every single detail so clearly that it was amazing! It was truly like 'looking out of a window' experience that most HD owners experience.

One of the main problems, that I found during my research, between LCD vs. Plasma specially for games and fast motion is the issue of motion blur which is a problem prevalent in LCD TV's. This is caused by the response time required by an LCD to change the image on the screen - the manual for my Sony Bravia LCD TV lists the response time of my TV at 8ms (milliseconds) which is the best an LCD TV can do at the time of writing (compare this with close to 0 ms for a CRT/Plasma TV). The response time can cause ghosting of images or motion blur for fast moving images specially in games - I am happy to report that there was no motion blur or ghosting that I was aware of during my gaming experience with Burnout Revenge, which has pretty quick action.

I tried another game - Perfect Dark Zero - and the results were stunning. There is a clear difference between the old standard definition (480i) and the new high definition (720p, 1080i, 1080p) resolutions that are simply amazing and once you see high definition content - you cannot accept anything else. Overall I am very happy with the results of mating my XBox 360 with my HD TV.


The XBox 360 as a DVD Player: I was curious to see how the XBox 360 would perform as a DVD Player. As reported previously, the XBox DVD Player sold in India is a region 5 player and will only play PAL content - it cannot play any other region (except universal or all region) discs. This was obviously a big disappointment, but I learnt to live with it. The XBox 360 does its DVD decoding and de-interlacing using the on board 500MHz ATI graphics processor. I also found after a little research that the XBox does not use all 3 cores in the IBM PowerPC CPU while playing the DVD player and some of them shut down during DVD playback.

The XBox DVD Player has the capability to output at 480i, 480p, 720p and 1080i (the 1080p will be provided as a software upgrade as per Microsoft press release). The XBox 360 games are output in all the formats upto 1080i assuming it is supported by the game. However, and this is a real bummer, the DVD Player only upscales DVD's to 480p thats it - period! No 720p or 1080i upscaling - what a let down! But considering the overall price of the Xbox 360, on which Microsoft is actually losing money, and considering what all it offers, it makes sense from a business perspective I guess. It would have been nice if the XBox 360 also came in a Premium Premium Pack that allowed the DVD Player to output at the highest supported resolution. So this is one thing to be aware of.

The media remote that comes with the XBox 360 Premium Pack is small, simple and uncluttered and does the basic job well. The load times of the DVD player are good and the menu's are intuitive and easy to use. The other nice feature I like is that the XBox remembers where you last left off and restarts the DVD at the correct point once you turn it on again. This is a real nice feature and very convenient - I really like it.

I popped in the 'Assault on Precinct DVD' to check out the difference. I really liked the images in terms of color and clarity. The lines were crisp and sharp and the black levels were very deep - none of the dark gray that you hear about in other LCD TVs - Sony obviously has done a great job with that. The fast moving action scenes were also great to watch with no obvious motion blur - the smoke, fog and snow rendered perfectly with excellent clarity. A lot of scenes in this movie have dark scenes with a lot of shadows, the DVD player and the TV performed very well in this area also and I was not at all disappointed. Compared to my old Sony Sony DVP-S500D DVD Player, I could see the difference in clarity and sharpness that was the difference between the 480i of my old player and the 480p of my XBox 360 DVD player which is a progressive scan DVD player.


Why LCD TV is a better choice than Plasma TV for XBox: Unlike a plasma TV, LCD TV's do not have a burn-in or image retention (IR) problem which is usually caused by static images in games (the score bar or other static images on the screen) as well as by static content on TV (ticker tape running at the bottom of the TV). In a plasma TV, the static images can cause the phosphors in that area to burn unevenly causing a image retention (which is not as severe as burn in) which manifests as a faint image of the static image even after the TV is switched off and then on again. Image retention is not so serious and goes away after some time. Burn-in is a more severe problem that causes the phosphors in the static image area to burn in - and this does not go away after a while and is more permanent in nature. Of course the technology is getting better all the time, with pixel shifting and other solutions for these problems in Plasma TV's, but I just didn't want to take any chances. This was the main reason that I opted for the LCD TV over the Plasma TV in the first place as I knew I would be playing a lot of games.

Resources:
XBox DVD Player Review
Microsoft Support - How to connect an Xbox 360 console to a TV by using the Component HD AV Cable

Monday, October 30, 2006

My Home Theatre System - Part II

The second part of this series describes the speaker configuration in my home theater system. As described in the first part, the speakers are driven by the eminently capable Yamaha R-V1103 multi-channel receiver. The speakers play a key role in the home theater system as they are ultimately responsible for sound delivery where the 'rubber hits the road' so to speak.


Front Speakers: My main front speakers are the Infinity Compositions Overture OVTR1 series of speakers. The Overtures are a 3 way full range set of speakers with an active side firing woofer - which means that these speakers need to be externally powered to drive the bass. Covering a frequency range of 35~20,000 Hz with a sensitivity of 92 dB at 1m/2.83 V with an 8 ohms impedance, the speakers do a great job of filling the room with clear crisp sound.


The 3 drivers that make up the speaker are:
Low Frequency: One 8" (200 mm) high efficiency, ultra-linear long throw magnetically shielded woofer.

Mid Frequency: Two 4" (100 mm) high efficiency, magnetically shielded mid-range drivers

High Frequency: One 1" (25mm) soft dome high efficiency, neodymium magnet, magnetically shielded tweeter

Specifications:
Amplifier Requirements: 10-100W @ 8 ohms
Crossover Frequencies: 300 and 3000 Hz
Peak Output: 250VA
Power Consumption: 150W (max), 7W (standby)
Width x Height x Depth: 5 3/4" x 12 1/2" x 12 1/2"
Weight: 13 kg

The Overtures are mounted on speaker stands that also come from Infinity and look pretty cool.

Center Channel: My center channel is the Infinity CC3 which is a low profile speaker system with two low and mid range drivers and a tweeter for high frequencies. This speaker has a frequency range of 80 ~ 20,000 Hz with the same sensitivity as the Overtures (91 dB @ 2.83 V and 1 m).


The drivers in this speaker are:

Low/Mid Frequency: 2 x 51 ⁄4" (125 mm) high-efficiency, ultra linear, long-throw, magnetically-shielded drive units

High Frequency: 1" (25 mm) soft dome, high-efficiency,neodymium magnet, magnetically shielded tweeter

Crossover Frequency: 2,500 Hz

The maximum peak output is 111 dB with an impedance of 8 ohms. The accompanying speaker stand allows a vertical tilt range of 25 degrees for ideal sound coverage whether placed on top of or below the television.

Rear Surrounds: My rear surrounds are the Infinity RS 5 floor standing speakers. These speakers feature Polypropylene Cones and Silk Dome Tweeters with co-injected woofer cones that are ideally suited for digital home theater sound. The Infinity RS-5 is a floor standing speaker with dual 6.5" drivers in D'applito configuration and a 1" soft dome tweeter.


Specifications:
Recommended Amplifier Power: 15-200W
Frequency Range: 35 ~ 20,000 Hz
Sensitivity (2.83V @ 1m): 92 dB spl
Nominal Impendence: 8 ohms
Bass: Dual 6 1/2" (160 mm)
High Frequency: 1" (25 mm) tweeter
Height, Width, Depth: 40 x 7 1/2 x 12 1/2"
Weight: 18 kgs

Active Sub Woofer: My home theater speaker system round up is completed by the Sony SA-WM40 - which is an active powered sub woofer with a 12" long throw driver in a bass-reflex (vented) cabinet. An onboard amplifier delivers 120 watts of power to the driver. The SA-WM40 sports both line-level and speaker-level inputs, as well as a line output for connection to additional subwoofers for even more bass. The crossover is variable from 50 Hz-170 Hz. This will help you to match this sub to the bass characteristics of your main speakers. The phase switch allows you to correct any phase conflict that may occur between the sub and your satellite speakers.


Specifications:
Type: Active Sub-Woofer (magnetically shielded design)
Speaker Unit: Woofer 30 cm diameter (12") cone type
Continuous RMS output: 120W
Reproduction Frequency Range: 20Hz to 170 Hz
High Feequency-Cut Off Frequency: 50Hz to 170 Hz
Phase Selector: Normal, Reverse
Input Jacks: Line Out (input jack pin)
Speaker Out: (output terminals)
Power Requirements: 120V AC, 60 Hz

Sunday, October 29, 2006

My Home Theatre System - Part I

I thought it would be be a good idea to share my existing home theatre system setup with the readers of this blog. I have had my system for about 8 years now and am thinking of an upgrade. This is the perfect time to talk about it and document everything before I replace the components and upgrade. In this first part, I will cover all the components of my home theatre system except my speakers which I will conver in Part II.

Home Theater System Components

TV: The Sony Trinitron 32" KV-32V40 is the center piece of my home theater system. I purchased this system for around $800 in the US around 10 years back. Trust me when I say that it was a lot of money at that time for a TV. This is a CRT TV with a 32" diagonal screen with speakers in a thin strip on either side. It has an extra set of composite inputs on the front for hooking up a gaming console or other video sources. The back of the TV has the main set of connectors: 1 x S-Video, 2 x Composite/Audio In and 1 x Audio Out.

Since I purchased this TV in the US, it has an NTSC tuner which is useless in India - so I cannot view cable TV directly on this TV - I have to first run it through my computer via a TV tuner card and then into my TV via the S-Video or Composite inputs. I tried purchasing an external tuner in Pune, but they just weren't upto the mark in terms of performance or picture quality.

Update: I finally found another way to make my NTSC TV work in India.

The other thing to note is that this is a 110V TV - which means I also need a step down transformer with adequate power ratings to convert 230V AC to 110V AC. The maximum power consumption of this unit is 180W - but given the other equipment that I have - I thought it safe to get a beefy 1000 W step down transformer to power all my 110V equipment.

The things I like about the TV are the reliability, good picture and color reproduction and simple styling. The things I think could have been done better are: more connectors - that's right - the TV has just one S-Video connector - considered state of the art at the time I purchased the TV. So it is a real pain for me to keep switching the S-Video between my XBox and my DVD Player - but I have learnt to live with this and now I am very adept at switching the S-Video cables using just my fingers to feel the outline of the connector slot at the back of the TV. But this is not an issue if you plan to use the composite connectors as there are plenty available on the front/rear of the TV. The TV also weighs in at 70 kgs - which means its a real heavy piece of equipment - but also very sturdy because it made is across the oceans in a container when I moved from the US to India and also survived the local transportation when I moved houses in Pune.

DVD Player: I purchased my Sony DVP-S500D DVD Player for about $500 about 8 years ago in the US. This was one of the first DVD players to hit the market - and naturally as an early adopter I was the first to purchase it regardless of the then steep price.


This player plans standard DVD's, music CD's and VCD's - but no MP3 because the technology wasn't prevalent at that time. The player also features 5.1 Dolby Digital output - which was a cutting edge technology at the time I purchased the player. In fact a sticker on the front of the DVD player screams - Dolby Digital 5.1 ch output. The players these days won't even mention this because this is now standard and taken for granted.

In terms of connectors, the player has a very good set of outputs including optical digital output and coaxial output for the 5.1 channel Dolby Digital audio output along with separate channel outputs for each of the 5.1 channels. The back panel also has composite, S-Video and component outputs for the video signal. The front panel includes a head phone jack for listening to music CD's with a line level adjuster.

This player is a region 1 player meaning that it will only play region 1 discs (US/NTSC) and of course All Region discs. I looked high and low for a firmware upgrade to override the region code setting but was unable to find it - so one main drawback of this player is that it will only play my US DVD's and Indian DVD's that are region free or universal.Since this was purchased in the US, this is also a 110V device - however the power consumption is very less compared to the TV - clocking in at a miniscule 22 Watts of power. This DVD player does not need a beefy step down transformer and will work just fine on a simple 50 Watt step down transformer that you can purchase at the local electrical store.

You can also select between 4:3 Letter Box, 4:3 Pan Scan and 16:9 aspect output for the video signal depending on whether you are connecting the player to a normal 4:3 aspect TV or a high definition 16:9 aspect plasma or LCD TV. Overall I love this player - I have had it for a while now and it has done a great job rendering high quality pictures on my TV. The dual discrete optical pickup with 96kHz 24 bit D/A converter does a phenomenal job in decoding the digital video and audio information encoded on the DVD and streams it in glorious color and detail into my TV and send a very high quality digital audio signal to my AV receiver to decode and amplify and drive my speakers.

Multi-channel audio receiver: The powerhorse of my home theater system is the Yamaha R-V1103 Natural Sound AV Receiver which I purchased for around $800 about 8 years back in the US. This receiver pumps out a beefy 100W per channel for each of the 5 channels in the 5.1 channel system. The receiver incorporates a Dolby Pro Logic Surround decoder along with a Dolby Digital (AC-3) decoder for multi channel sound reproduction. Yamaha is also known for its DSP (Digital Sound Processing) and the receiver comes with 10 DSP modes with settings for Rock Concert, Jazz Stadium, Church, Disco, Stadium, TV Sports, Movie Theater and Hall. To be honest, I am not a big fan of the DSP modes and I can hardly distinguish between these different modes and don't really use them that much.


The key specification for which I purchased this receiver is of course the Dolby Digital AC-3 decoder which provides completely independent multi-channel audio - with five full range channels in what is referred to as 3/2 configuration - 3 front channels (left, center, right) and 2 rear channels (left and right). A sixth bass only channel is also provided for output of LFE (Low Frequency Effect) - this channel is counted as 0.1 - giving a total of 5.1 channels. This allows precise sound orientation and gives rise to clarity in the sound signal that is unprecedented - you can hear effects like bullet casings hitting the floor behind you in a gun battle scene, or the screaming wail of a Formula 1 car as it blazes around the track. This is a truly immersive sound field and has to be experienced to be believed. Believe me, once you have experienced Dolby Digital sound in your home, you will never want to go back to the older Dolby Pro Logic sound.

The Yahama receiver comes with a plethora of connectors to satisfy every device that can be connected to it. It has an RCA type input each for Phono, CD, Tape, DVD/LD, TV/DBS, VCR (in/out). In the digital audio section, it has 1 x optical digital output and 2 x coaxial digital outputs. It also features separate RCA outputs for each of the 5.1 channels. In addition, it also has a video output section with 3 x S-Video connectors - of which one is a monitor out and the other two being S-Video in and out respectively. There are also 5 x composite video connectors with 1 monitor out, 2 reserved for DVD/LD and TV/DBS and 1 pair of VCR in/out composite connectors. The front panel of the receiver also has an S-Video input and 1 x composite audio and video inputs for easy connection of a gaming console or camcorder. Again as usual I find the connectors inadequate and would have loved to have an additional optical digital output and a digital coaxial output along with an additional S-Video input - I don't mean to sound greedy - but I really need these additional connectors to avoid constantly fiddling with the back panel of the receiver.

There are also speaker terminals on the back panel to connect the 5.1 channel speakers - left front, center, right front, left rear surround and right rear surround. The receiver also supports two sets of speakers for the front left, center and right - referred to as A/B speakers - you can connect upto 2 front left speakers, 2 front right speakers and 2 center speakers if you so wish. There is a switch on the front panel of the receiver that allows you to select between the A, B or both AB speakers.The receiver also features main channel line level outputs for driving speakers with an external amplifier - so if you want the Yahama receiver to decode the signal using the onboard Dolby Digital decoder but want the amplification to be done by a dedicated amplifier, then the main channel line level outputs can be used to feed the line levels directly to the amplifier which will in turn drive the speakers. In this case you will be primarily using the AV Receiver as a Dolby Digital Decoder and using another external amplifier to amplify the sound source and drive the speakers.

This configuration makes sense if you have a really good dedicated amplifier and want to squeeze that extra level of detail from the sound - for most home theaters this is an overkill. the only decive you would connect to the line level output of the receiver would be the sub-woofer, as this device has an inbuilt amplifier to amplify the line level input signal.The receiver also has a built in AM/FM tuner with an AM antenna loop that comes in the box which can be hooked up to the rear panel to receive AM/FM broadcasts. You can also connect an indoor FM antenna or an external outdoor FM antenna for better FM reception.

The silver remote that comes with this unit is a masterpiece in itself. It is a learning remote meaning that you can program it to control all your home theater devices like DVD Player, CD Changer and Tape Deck. It has a macro facility that allows you to do many operations with a single button press - for example - turn ON the TV, Receiver, DVD Player and press PLAY on the DVD player OR power down the TV, Receiver and DVD Player all with a single button click. The remote is backlit and has raised bumps along the buttons to easy control in the dark. The remote has a face-plate that can be opened up to reveal a whole bunch of other buttons that can perform virtually any operation you can think of.

CD Changer: My home theater also features a 110 CD changer from Yahama (no surprises there). The Yamaha CDM-900 110 Disc CD Changer holds all the CD's that I listen to and offers a convenient way to organize and group my CD's based on music type and style. It allows me to label each CD by artist and title and has the ability to display this information when the CD is playing. The really cool thing is that once you enter this information, the system remembers it and even if you change the CD position in the player, it is able to associate the CD with the artist/title information that you previously entered. It is this kind of intelligence that I really love - and I think small touches like this go a long way in making a good system an excellent system.


The CD changer has a front loading system with a front panel that swings down to reveal 110 CD's stacked vertically with the slot numbers labeled on the bottom face of the inside of the front panel. There is also a disc carriage loader that allows easy loading and unloading of CD's from their slots - but this is not really needed in day-day use. The remote that comes with the player has all kinds of buttons to do virtually anything you need sitting on your couch. The 110 CD's are organized as 5 groups - A,B,C,D and E. So for instance discs 1-20 are in Group A, discs 21-40 in Group B and so on. This allows you to categorize discs according to artist or music type and you can enjoy various play modes in each group. For instance you can select Group A and set it to random play or repeat plan - in which case discs 1-20 will be played in the selected play mode. This feature is quite useful if you have genres of music (rock, pop, jazz, new age, lounge) that you want to listen to as a group.

The CD changer also features a +1 disc - this is the first disk slot and is used if you want to listen to a CD and then remove it from the player. The +1 disc slot is usually kept empty for this purpose and allows you to quickly slip in a disc and listen to it without having to remember which empty slot you placed the disc in.Care has to be taken while moving the CD changer and if you need to transport it from one location to another, always remove the CD's from the changer before moving it. Otherwise, the CD's can fall into the player and you will have to unscrew the cover and get inside the player to remove the discs and restore order. I have done this a few times - the good part about the internal layout of the CD changer is that it is very well organized and uncluttered allowing you to work efficiently. I don't think I need to say that you need to make sure you unplug the device before attempting to open it - that's common sense isn't it?

Finally this is also a 110V/60 Hz system which I need to run on my step down transformer, however the power consumption is a measly 15Watt making this a good candidate for a smaller independent step down converter that you can purchase locally. Also this player can be chained to another CDM-900 CD Changer to have continuous play of 220 CD's if you so desire. The back panel of the CD changer has one optical output and 1 standard RCA phono jack for left right stereo sound output to an AV receiver. In my case, I have connected my CD changer to my AV receiver using the RCA phono jacks.As with all Yahama products, styling is very clean and uncluttered. The LCD panel on the front on the CD changer (and as with the AV receiver) is a cool orange - which looks really nice at night with all the lights switched off and has a charm of its own. The front of the panel also has a jog dial which you can rotate to change discs easily and is also used for entering artist/title text into the player. Overall I love my CD changer and have been very happy with it ever since I have owned it and highly recommend it if you are looking for one.

Twin Tape Deck: The twin tape deck also happens to be a Yamaha product - the K-903 Natural Sound Stereo Cassette Deck with auto reverse 4 track, 2 channel recording and playback. The tape deck comes with two decks - A and B with continuous relay play feature that allows you to play both sides of cassette A and B continuously in many different modes. It also has a Dolby Noise Reduction feature to eliminate hiss and noise during playback. The LCD screen on the front panel features a peak level meter in orange that looks quite cool and displays the peaks of the signal levels during playback or recording over a -30dB to +6 dB range. There are separate meters for each left and right channel.


The tape deck also has high speed dubbing function from Deck A to Deck B which allows you to quickly make copies of your casette tapes. The frequency response of the tape deck is between ~20-16000 Hz +/- 3 dB for Type I Normal tapes and this can go all the way to 20-19000 Hz +/- 3 dB for Type IV Metal tapes.

I hardly use the tape deck - and it is primarily used by my Dad to listen to and record his tapes. However as with the other Yamaha products, the build quality and finish is excellent and it has performed without any problems for over 6 years now - so I have no complaints and am very happy with this component.

Conclusion
This covers a round up of my home theatre system except for my speakers which I will cover in a second post. Hope you enjoyed reading this!

Friday, October 27, 2006

Product Review: Sony Bravia KLV-V40A10 LCD TV

The Product


The Sony Bravia KLV-V40A10 is the 7th generation LCD panel from Sony featuring a 40 inch (102 cms) screen with a wide screen 16:9 aspect ratio. This panel features a screen resolution of 1366x768 making it a tad over 1 mega pixel ( 1,049,088 pixels). The V series also incorporates the Wide Color Gamut - CCFL technology that is supposed to emit deeper reds and greens for more accurate color reproduction.

Specifications
The two main contenders in the Sony stable of LCDs in the 40" range are the KVL-V40A10 and KVL-S40A10 - the differences between the two are listed below.

Differences between V series vs S series
The key differences between the V and S series are as follows:
  • The V series panel has more connectors than the S series. For instance the High Speed USB port and HDMI input is available in the V series but not in the S series (except the 46" S series). Also the V series has an extra component input as well. Non-availability of HDMI on the S series (except the 46" S Series) is a deal breaker for me.

  • The V series has more brightness at 500 cd/m2 as opposed to 480 cd/m2 for the S series.

  • The V series also has more contrast at 1300:1 as opposed to 1000:1 for the S series.

  • 2 Tuner Picture And Picture (PAP) is available in the V series while a single tuner Picture In Picture (PIP) with Picture Freeze is available in the S series. The former allows you to watch two video sources at the same time while the latter allows you to freeze an image from the programme while the programme continues playing in a smaller screen. I am not sure this is such a big deal because I seriously doubt if I will be using this feature a lot.

  • The V series also has powerful audio output 13Wx2 as compared to 10Wx2 for the S series. There is also a built in digital amplifier in the V series that is missing in the S series. This again is not a critical difference because I will hardly be using the TV speakers and will rely on my home theatre receiver to do this job.

  • The V series has a cloth finish on the front speakers compared to a silver metal grille on the S series. In my opinion, the latter finish is more sleek as the cloth cover tends to gather dust over a period of time.

  • The V series also features the Wide Color Gamut - CCFL (Cold Cathode Fluorescent Lamp) that uses improved phosphors to emit deeper reds and greens for more accurate color reproduction. This feature is missing on the S Series models.


Review


External Appearance


The Sony Bravia KLV-V40A10 has a nice black bezel surrounded by a thin silver frame giving it an elegant and presentable look, specially when it is mounted on the pedestal stand. The BRAVIA badge is prominently displayed on the top left. The speakers are integrated in the bottom of the panel giving it a sleek look and making it a lot less wider than other panels in the market allowing it to squeeze into display cabinets a little easier. The right side of the panel contains the following buttons:

  • Power On

  • Channel +/-

  • Volume +/-

  • Input Selector (allows you to select the signal source in case multiple sources are connected)

  • Wega Gate (brings up the On Screen Display)


The front of the screen has the remote control sensor, power indicator, standby indicator and picture off indicator (picture is switched off, sound is unchanged).


The left side of the panel has easily accessible connectors for:

  • High speed USB port to connect your digital camera or multi-card reader.

  • Component Input

  • Composite Input with L/R audio

  • Headphone out


The back of the TV has the main connector panel with the following connectors:

  • 2 Component/Audio In

  • 1 S-Video

  • 3 Composite/Audio In

  • 1 HDMI Input

  • 1 HD15 PC Input

  • 1 PC Audio Input

  • 1 Audio Out


My main gripe with the back panel is the lack of an extra HDMI connector. Sony is charging a lot for their panel as compared to other vendors in the same panel size, so in my opinion they should have added an extra HDMI input. This would allow me to connect my XBox 360 (when they come out with the HDMI cables) and my HD-DVD or Blu-Ray DVD player when I buy one without having to keep switching out the HDMI connector at the back of the panel. Of course, this is a solution for this in the form of a HDMI switch - that is available in a 4x1 model that allows you to connect upto 4 HDMI input sources into a single HDMI input connector. But adding this box means one more device in my rack along with the additional cables and remote.


The other thing I didn't like is that the PC input is on the back panel - in my opinion it should have been on the side - as the PC is something one would connect to the TV once in a while and not leave it connected all the time. The position of the PC input on the back means that I need to leave a dedicated HD-15 PC connector always connected to the back of the panel and dangling down my display cabinet for use whenever I connect a PC. If it were on the left side panel instead, then I would not have to leave it always connected and could stow the cables away and connect it only when I use my laptop or computer with the panel. However I don't think that this is a serious defect - just something that would have been nice from a logical and ergonomic perspective. The same comment applies to the PC audio input cable which needs to be left connected to the panel for the same reasons as the HD-15 PC connector.


The other thing I would have liked is an extra component input - I wouldn't have minded if one of the composite inputs was discarded in favor of an extra component input because it doesn't make sense for a high-definition panel to have more low-resolution connectors than high resolution connectors.


The ergonomics of the layout are good and allow easy access to common connectors whether the panel is wall mounted or on a pedestal. The absence of controls on the front panel gives it a nice sophisticated look which I like. The stand design is also clean and uncluttered and features a strap that you can connect to the base of back of the stand and the cabinet on which the TV is placed in order to secure it and prevent it from toppling over. Sony also features a simple plastic wire manager at the back of the panel running behind the stalk of the stand to organize and reduce clutter arising from the back panel connections. The stand also let's you swivel it in a 30 degree around the horizontal and tilt it around 3 degrees to the front and 8 degrees to the back.


The Remote


The Sony remote is a programmable remote - but the catch is that it recognizes only Sony devices such as Sony DVD players, VCR's, Home Theatre Systems and Amplifiers. The remote is fairly cleanly designed with a plain look. The center of the remote has a Wega Gate button (also available on the right side of the panel) that activates the On Screen Display which is well laid out, easily navigable and looks quite nice. The main settings and configuration of the TV can be accessed with the Wega Gate function. The remote also has DVD/VCR stop/play/rewind/pause/skip forward-behind/fast forward/fast rewind/record buttons that can be used to operate a Sony DVD or VCR player. It also has a Return To Previous Channel button that I really like while watching TV which allows you to toggle between two channels rapidly. It also has a Power Saving button that allows you to view pictures with reduced power consumption. You can also turn the picture off with this button leaving the sound unchanged. There is also a light sensor button that senses the ambient light in the room and automatically adjusts and optimizes the picture settings. Through the Wega Gate menu you can also access the Game Mode which is optimized for playing games on consoles like XBox 360 or PS3. There is also a video labeling feature that allows you to assign a name (such as XBox 360, DVD Player) to the input video source and this is displayed on the screen while switching between the video sources. It also allows you to skip connectors to which no input video sources have been connected so that these don't show up when you are switching between the input jacks. The remote also controls the twin picture function that allows you to see two pictures side by side. There is also a Freeze function that allows you to freeze the current picture on the screen - this is handy if you need to take down phone numbers or addresses from the screen.


The Picture


And finally the most important part of the review - the picture quality! I took a bunch of DVD's to view on all the Plasma/LCD screens that I had shortlisted, they included:

  1. Super Speedway

  2. King Kong

  3. Dark City

  4. Kingdom of Heaven

I took Super Speedway to look at fast moving scenes, King Kong for the tremendous amount of detail that it has in each scene, especially the scenes on Skull Island and Dark City and Kingdom of Heaven for their dark black levels. The DVD player was a Denon and was connected to the displays via component output.


  • Fast moving picture: I ran Super Speedway on four display panels side by side: LG, Panasonic, Hitachi and Sony. The LG, Panasonic and Hitachi are all plasmas while the Sony is the lone LCD in the lot. Traditionally plasmas have an edge over LCDs when it comes to displaying fast images due to the slower response time of the LCD pixels to switch from one color to the other often causing a motion blur which can be quite unpleasant. I am happy to report that with the 8 millisecond response time of the Sony panel, there was hardly any motion blur that I could make out between the LCD and Plasma panels. I am sure if you go up close with a magnifying glass, the plasma picture may have a few pixels lighted up better than the LCD - but from where I was sitting, it was hardly obvious. The LCD performed as well as the plasma and even though I looked very hard for motion blur in the fast moving race track scenes, I was hard pressed to see any lack of resolution on the LCD. The scene where the race car speeds along the track with the camera mounted on the front, where the clouds and trees on the track are reflected on the nose of the car are rendered equally well on the plasma and the LCD. The Sony picture has a slightly warmer red color compared to the other panels and this was evident from time to time - but I found it pleasing rather than annoying - but this is something to look out for as a personal preference. There was another scene with the camera mounted on the back of the car with the name of the sponsor GoodYear in a small font on one of the panels of the car. As the car sped by, the reflections from the side and clouds on this panel showed the name GoodYear clearly on the LCD but this had a lot of flicker on the plasmas.


  • High Level of Detail: Next I popped in the King Kong DVD - which has a tremendous amount of detail and dark scenes. I started off at Chapter 20 where the ship gets stuck on Skull Island and the crew move ashore where they meet the islanders. The Bravia had a very clear crisp picture and was able to hold its own against the plasmas. The dark and black levels in the Sony could not match the plasma if one looked very closely - and did not capture the detail in the black level that the plasma did so well - but this is noticeable only if you are looking for it - otherwise if you are not analyzing the pixels as each frame goes by, then this is rendered with acceptable quality on the Bravia LCD panel. There are many scenes in Kind Kong that I froze on the DVD player and examined all the four display panels closely, the Sony did a decent job with resolving detail and providing image depth - though there were many cases where the plasma, specially the Panasonic, had a great deal of depth. Again, this is subjective and the store owner thought the plasmas had better depth but I was not convinced and in my eyes the LCD did as good a job as the plasmas. At this point I just want to point out the most important tool while making your decision - your eyes! That's right - ultimately the specifications and technology boils down to how your eyes perceive the picture - so always go do a test before you but your high definition display panel and trust your eyes over some one's opinion.


  • Black Levels: The plasmas have traditionally have an advantage in this area with the ability to reproduce much deeper black levels than an LCD and it was evident during my test. However the old days where black was represented by dark gray is long gone and the Bravia's display the deepest blacks that I could see. But please note that I was watching this during the day in a well lit room, if I turn off all the lights and view the Bravia in the night, then I am sure some dark gray would be evident in the black scenes - but this can be countered by soft ambient lighting or back lighting in the room - which will fool the eyes into accepting the dark grays as blacks. However I must stress that the picture quality did not look awfully bad during the black scenes - just that the plasmas did a better job there. The other interesting thing was that the level of detail in the dark areas was captured better by the plasma, for instance in scenes in Dark City where Jack Murdoch goes into a dark alley or under a stairway, the plasma always revealed some detail that the LCD just displayed as black with little or no detail. However personally I did not find this black level handling so poor as to pass over the Bravia and consider a plasma instead. However this is a personal preference and one area I would like you to be aware of and take a look at yourself and decide before making the purchase.


  • Normal picture: As far as the normal picture with adequate lighting levels and normal motion were concerned, I for one was not able to see a huge difference between the extremely capable Panasonic/Hitachi plasmas and the Sony LCD. The Sony had a very clear crisp picture with good detail level and color reproduction. As I mentioned before, the Sony has a different red compared to other vendors and this was plainly evident - however I found it very pleasing and natural - but your opinion may be different - so watch out for this. I was able to discern a good amount of detail in the Sony and did not see a striking difference between the plasma and LCD from normal viewing distance in this regard - which goes to show how much progress the LCD technology has made in the recent past. Sony had great color reproduction, a crisp bright image and good color tone that was very compelling to the eye. I am sure when I get my TV, the first thing I would do is get an Avia disk and adjust the color and contrast - the On Screen Display of the Sony provides ample scope for adjustment and tweaking to get the best picture.


Conclusion


After a long slow patient wait and comparing many plasma and LCD panels from different vendors, I finally settled on the Sony KVL-V40A10 and I think I made the right decision given my key decision making criteria mentioned on a previous posting. The main driving factors that made me take up the Sony LCD versus the Panasonic or Hitachi plasma (LG was never even in the race) was because I mainly intended to use the TV in my living room which is rather bright. LCD's have much higher brightness as compared to a plasma, also the plasma panels have a tendency to reflect a lot while the LCD panels have almost zero reflection. The other main criteria for me that made me choose the LCD over the plasma was that I planned to do a lot of XBox 360 gaming and use my panel as a computer monitor - both of which can cause image retention and burn-in in a plasma - where a static image can burn into the screen and remain visible long after the image goes away. Also from all the information I had read about the plasma, a lot of care had to be taken specially during the initial 100 or so hours where one had to be very careful about the video sources connected to the plasma taking care to avoid TV shows with a ticker tape or watching movies with side bars that could burn into the plasma. LCDs don't have any image retention or burn in issues like the plasma - so this was a very important factor for me that made me choose LCD over Plasma. In the LCD's, Sony definitely had the best picture and styling, not to mention reliability - my current TV is a 32" Sony Trinitron that I have had for 10 years and still performs superbly, my first DVD player was a 1st generation Sony DVP-S500D that I got for a whopping $500 in the US about 8 years ago and is still going strong - so this is a brand that I am very comfortable with due to my personal experience. So I am very happy with my purchase, which I expect to be delivered in the next couple of days. I will do another posting once I receive and setup the TV. Till then - good bye!


Resources
CNet Review for Sony Bravia KLV-V40A10 LCD television
Bouncy Balls: The BRAVIA Commercial
Exploding Paint: The BRAVIA Commercial

My Hi-Definition Safari

The Jungle
A few months ago I decided it was time to get a high definition TV. I fired up my notebook and started what seemed like a simple search to find a good high definition TV that would suit my needs. What happened in reality was that I was hit by a ton of products and specifications and technologies that I had never heard of - and so I attempted to find out more about the beast before bringing one home. This was a big challenge because researching high definition equipment in Pune is difficult due to lack of knowledgeable folks. That started off my safari in the high definition jungle - the beasts here are cunning and adapt very quickly - by the time you approach them they have changed colors and spots and voltage ratings - and they are quick you devour you if you make a mistake. I oiled my trusty Google rifle and set off to hunt - determined to bring a beast home. Here's how it all played out...

The Beasts
Very quickly it became clear that there were a bunch of key offerings from a technology perspective that could provide me the high definition viewing experience I was looking for:

  • Plasma TVs
  • LCD TVs
  • Rear Projection TVs
  • Projectors

As I ran through the list and started researching it, the pro's and con's of each technology became apparent very quickly allowing me to whittle down my list to the final two technologies -LCD and Plasma - that I would go on to consider. I won't try to go too much in depth here as there are tons of information about the pro's and con's of each technology out there - that it would be pointless to start replicating all that here. So instead I will summarize the information in a separate blog to do it full justice.

The Lure

The key decision factors in the model selection were:

  • Branded product
  • Good product reviews
  • Excellent picture quality for high definition content (DVD, XBox, HD-DVD, Blu Ray, Divx)
  • Acceptable picture quality for standard definition content (cable TV)
  • Good screen life
  • Good dealer/service network
  • Good resale value
  • Easily available finance options
  • Future proof to the extent possible
  • Should have a ton of connectors (composite, component, S-Video, HMDI, VGA/DVI, RF)
  • Width of the panel with speakers should not exceed 46" (limitation of my display rack)
  • Should have Picture-In-Picture facility
  • Should work well in a bright room
  • Must act as a PC monitor for Internet surfing on the big screen
  • Minimal burn-in/static image problems

I thought it would be as easy once I knew what I was looking for, however as I found out, the hunt wasn't going to be an easy matter.

The Hunt

After evaluating the technologies, for reasons mentioned above, it became clear to me that if it was high definition nirvana I was seeking, then LCD/Plasma was the only way to go with either LCD or Plasma at the 42" screen size and LCDs for the 42" and smaller screens and Plasma for the 42" and larger screens. With that clearly established, I started the hunt by going to the local stores in Pune on MG Road and Dhole Patil Road to check out some of the Plasma/LCD panels on display. Fortunately most of the main brands available in the US are available in India - the only difference being that the number of models available in India are only a handful of the complete portfolio of products available with these vendors globally. Given the market in India and the purchasing power, I guess it makes sense for them to focus on the models that are perceived to sell well in India. This is what my experience was like:

LG: The LG showroom in Pune was a great example of people trying to sell products that they don't know anything about. The staff in the store that I went to had no clue what the difference was between an LCD and a Plasma display. They also had no idea what high definition meant and were generally clueless. The safest bet is to ignore everything they say and do your own research. That is what I ended up doing and found that the 42" display that I felt was close to my requirements was the 42PX4RV model. However hard I tried to like LG - I found it really difficult to digest the lack of knowledge of people selling their products - for which I partly blame LG because I believe it is their job to educate their sales force about their products.

Samsung: Samsung has an excellent and very focused India strategy. This is apparent in their high profile advertising in print and TV, billboards all over the city, roping in top tier movie stars to hawk their wares and a India website that stands heads and shoulders above all the other vendors in the market today (other than Sony). This multi-pronged approach to spread knowledge about their products and technology to a wide audience highlights Samsung's commitment to the India market. This should be an important factor in the decision making because this usually means: (a) an extensive service and dealer network (b) perceived brand value which makes it easier when you want to sell your old display panel and upgrade to a new one (c) easy availability of parts in case of repair (d) upto date information available on the Internet which means you are not at the mercy of local dealers to get upto date product information (e) good finance options to purchase their products. Samsung, unlike Sony, has both LCD and Plasma display panels - with LCD panels in the 15" - 46" panel size and Plasma in 42" - 63" range. The only area that I found confusing about Samsung was the sheer number of models that they carry - with very little comparison information about the differences between each model - making it the consumers job to do their homework and figure out what exactly they want. For instance Samsung has the Bordeaux, M6, M5, S5, R5 and T5 series in their LCD range and the P5, D5 and S5 in their plasma range for India. I asked the local dealer in Pune what the difference was between these models - and his answer was that the Bordeaux model was made in India while the rest were imported. I didn't really buy his theory - and will have to load the product manuals for each of the models from the Samsung website (which is something I really like about Samsung) and do the comparison myself. I will post it once I have the details in an easy to understand format - both for me and others looking to buy these products.

Sony: The name Sony evokes instant brand recognition in India and is also perceived as high quality brand making it one of the main contenders in my purchase decision. Sony doesn't advertise as aggressively as Samsung - and in my opinion is counting on their brand to speak for itself. However during the recent Diwali festival, Sony's advertisements for their Bravia range was splashed almost daily for a week in the local dailies. Sony also pioneered (pun unintended) the concept of Sony World - a single exclusive showroom for all Sony products available in India which was intended both as a branding exercise, product information and consumer awareness program which in my mind is a huge success - this concept today has become deriguer with all the other manufacturers. Sony used to make both LCD and Plasma panels earlier - but has now officially stopped making plasma displays and are focusing exclusively on their LCD range dubbed BRAVIA (Best Resolution Audio Video Integrated Architecture). With the current technology, LCD's work best in sizes 42" and under - once the panels start getting bigger in size the problems with LCD start becoming apparent. The Sony models that I had shortlisted were the KLV-S40A10, and KLV-V40A10. The model I was really keen on was the KLV-46V2500 model which is not available in India at the time of writing. The other thing to note about Sony is that their TV's are on average more expensive than any of the other vendors for the same panel size - this I assume is Sony cashing in on their global quality brand perception.

Hitachi: Hitachi has a very thin network in India - and they don't seem to be really targeting the Indian high end consumer goods market in a big way like Sony or Samsung. This is apparant from the handful of dealers listed on the advertisements, as well as very sparse information on their India website. Unlike Sony, Hitachi manufactures both LCD and Plasma TV's - with the LCD TV topping off at around 40" and the Plasma TV's taking it over from there. The 42" model that caught my eye was the 42PD8900TA - this is a plasma TV with a 1024x1080 pixel resolution supporting upto 1080i resolution (that's right - no 1080p). This screen has an unusual resolution in that it has 100% of the vertical resolution required for a high definition display - viz. 1080 lines - but is 20% short of the high definition horizontal resolution of 1280 pixels. This difference is not apparent when you play the content available in the market today - but could be a problem a few years down the road when you start getting high definition content - where this deficiency can start becoming a real pain - especially when you have plunked down some serious cash for this display. The retail cost of the 42PD8900TA in Pune was between Rs. 1,75,000 and Rs. 1,79,000. The big problem with buying Hitachi in India is that they are not registered with any of the credit card companies - so getting finance from a credit card company for a Hitachi TV is not an option. You can either take a personal loan (at a whopping 10-14% interest at the time of writing) or make a down payment to the vendor and use your credit card to split down the remaining amounts into smaller EMI's spread out over 6-12 months. This is a serious shortfall of Hitachi in India today. The other issue is the service network - I called their helpline and was relieved to hear that they had at least one service center in Pune - but that's still a concern given the number of service centers that other manufacturers have locally. These are some areas that Hitachi needs to start looking into seriously - because even though they have a fabulous product - getting it into the hands of the consumer and increasing their comfort level with the brand and service will be an uphill battle for them going forward given their current strategy. Detailed reviews and specifications of the 42PD8900TA can be found here.

Pioneer: Pioneer has no India strategy to speak of. The company does not advertise their plasma panels in India, they have no brand recall or recognition to speak of, they have a very sparse dealer/service network - in other words everything designed to keep one from buying their products. I was able to finally track down a small boutique store in Pune that had Pioneer products but even they only had a handful of models and no finance options available. So I didn't pursue Pioneer further even though they have some very critically acclaimed models - the other negative factors far outweighed any advantages that the company had to offer - which is a shame but unfortunately that's how the dice rolls.

Philips: Philips is also a well known brand in India, in my opinion falling somewhere after Sony and Samsung but ahead of LG in terms of brand reputation. Philips sells LCD panels made famous by their AmbiLight feature. The largest model they sell in India at the time of writing was the 42" LCD TV - 42PF7421/98.

Panasonic: Panasonic has been selling products in India for a while, but is not as high profile as either Sony or Samsung. Panasonic is slightly better than Hitachi in my opinion, because they seem to have established a decent dealer network in India - nowhere near the network size of Sony/Samsung/LG - but definitely better than Hitachi or Pioneer. Also the good news with Panasonic is that they offer finance options on their products unlike Hitachi - which means product acquisition is a little easier for end consumers. However there are still a lot of key differences between Sony/Samsung/LG trio vs. Panasonic - the latter has only recently started advertisement campaigns for their plasma range of TV's and don't have such a mass appeal and brand recognition in India (save Mallu's who got back Panasonic stereo systems from Dubai). So it will be an uphill struggle for them to establish their brand name in this high end consumer electronics segment - they will need to have a clear and coherent brand strategy in India to succeed. If they adopt the stand-offish attitude of either Hitachi or Pioneer - they are doomed. The reason why I chose to highlight Panasonic is because they have some excellent reviews for their plasma displays and seemed reasonably priced too (compared to Sony).

One thing I consistently noticed was that the typical large multi-brand showroom have salesman that don't really know much about the product they are selling nor do they understand the typical customer profile for the high end products. This is one area where all the dealers fall short - they just don't understand the profile of the customer who would be interested in such products and how to pitch and sell these products to the consumer. A lot of consumer education is sorely needed in this area - and I think the onus is on the manufacturers to take the lead in this and educate their dealers. This is where the boutique stores shine - they have a very clear understanding of the customer, know exactly how to talk to and treat the customer and have no pressure selling tactics that make it such a pleasure to work with. They are also on average, more knowledgeable about the products they sell and are passionate about it - which gives them a huge edge over the average retailer/dealer who is solely focused on his bottom line.

The Kill

The stalking has started in earnest and the quarry seems near - the grass sways gently in the breeze and I can see the stripes and the swish of the tail - yet as I approach the grasses part and the clearing is empty - I can scent the beast but can't get it in my sights yet - it continues to elude me. I will spend the next few weeks staking out the display panels that make it to my top 3 and provide detailed reviews and specs for each one. Hopefully by then I should be ready to make my purchase. I will keep you posted - hope you enjoyed reading his article.